Planet Landings

Yes, you read that right.

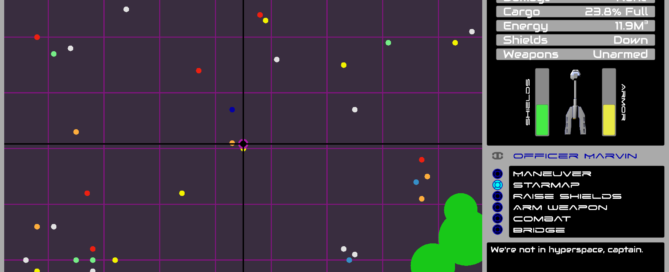
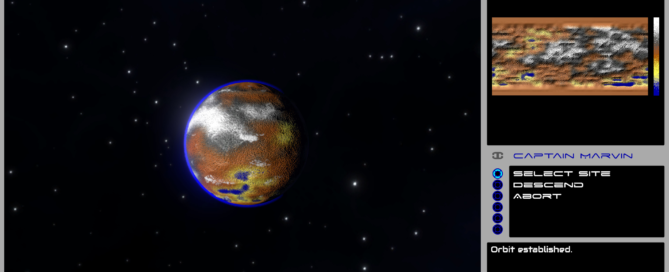
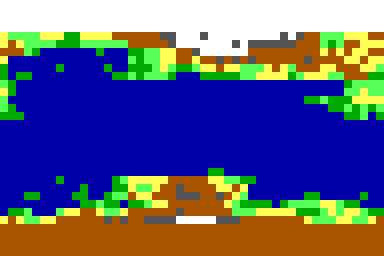
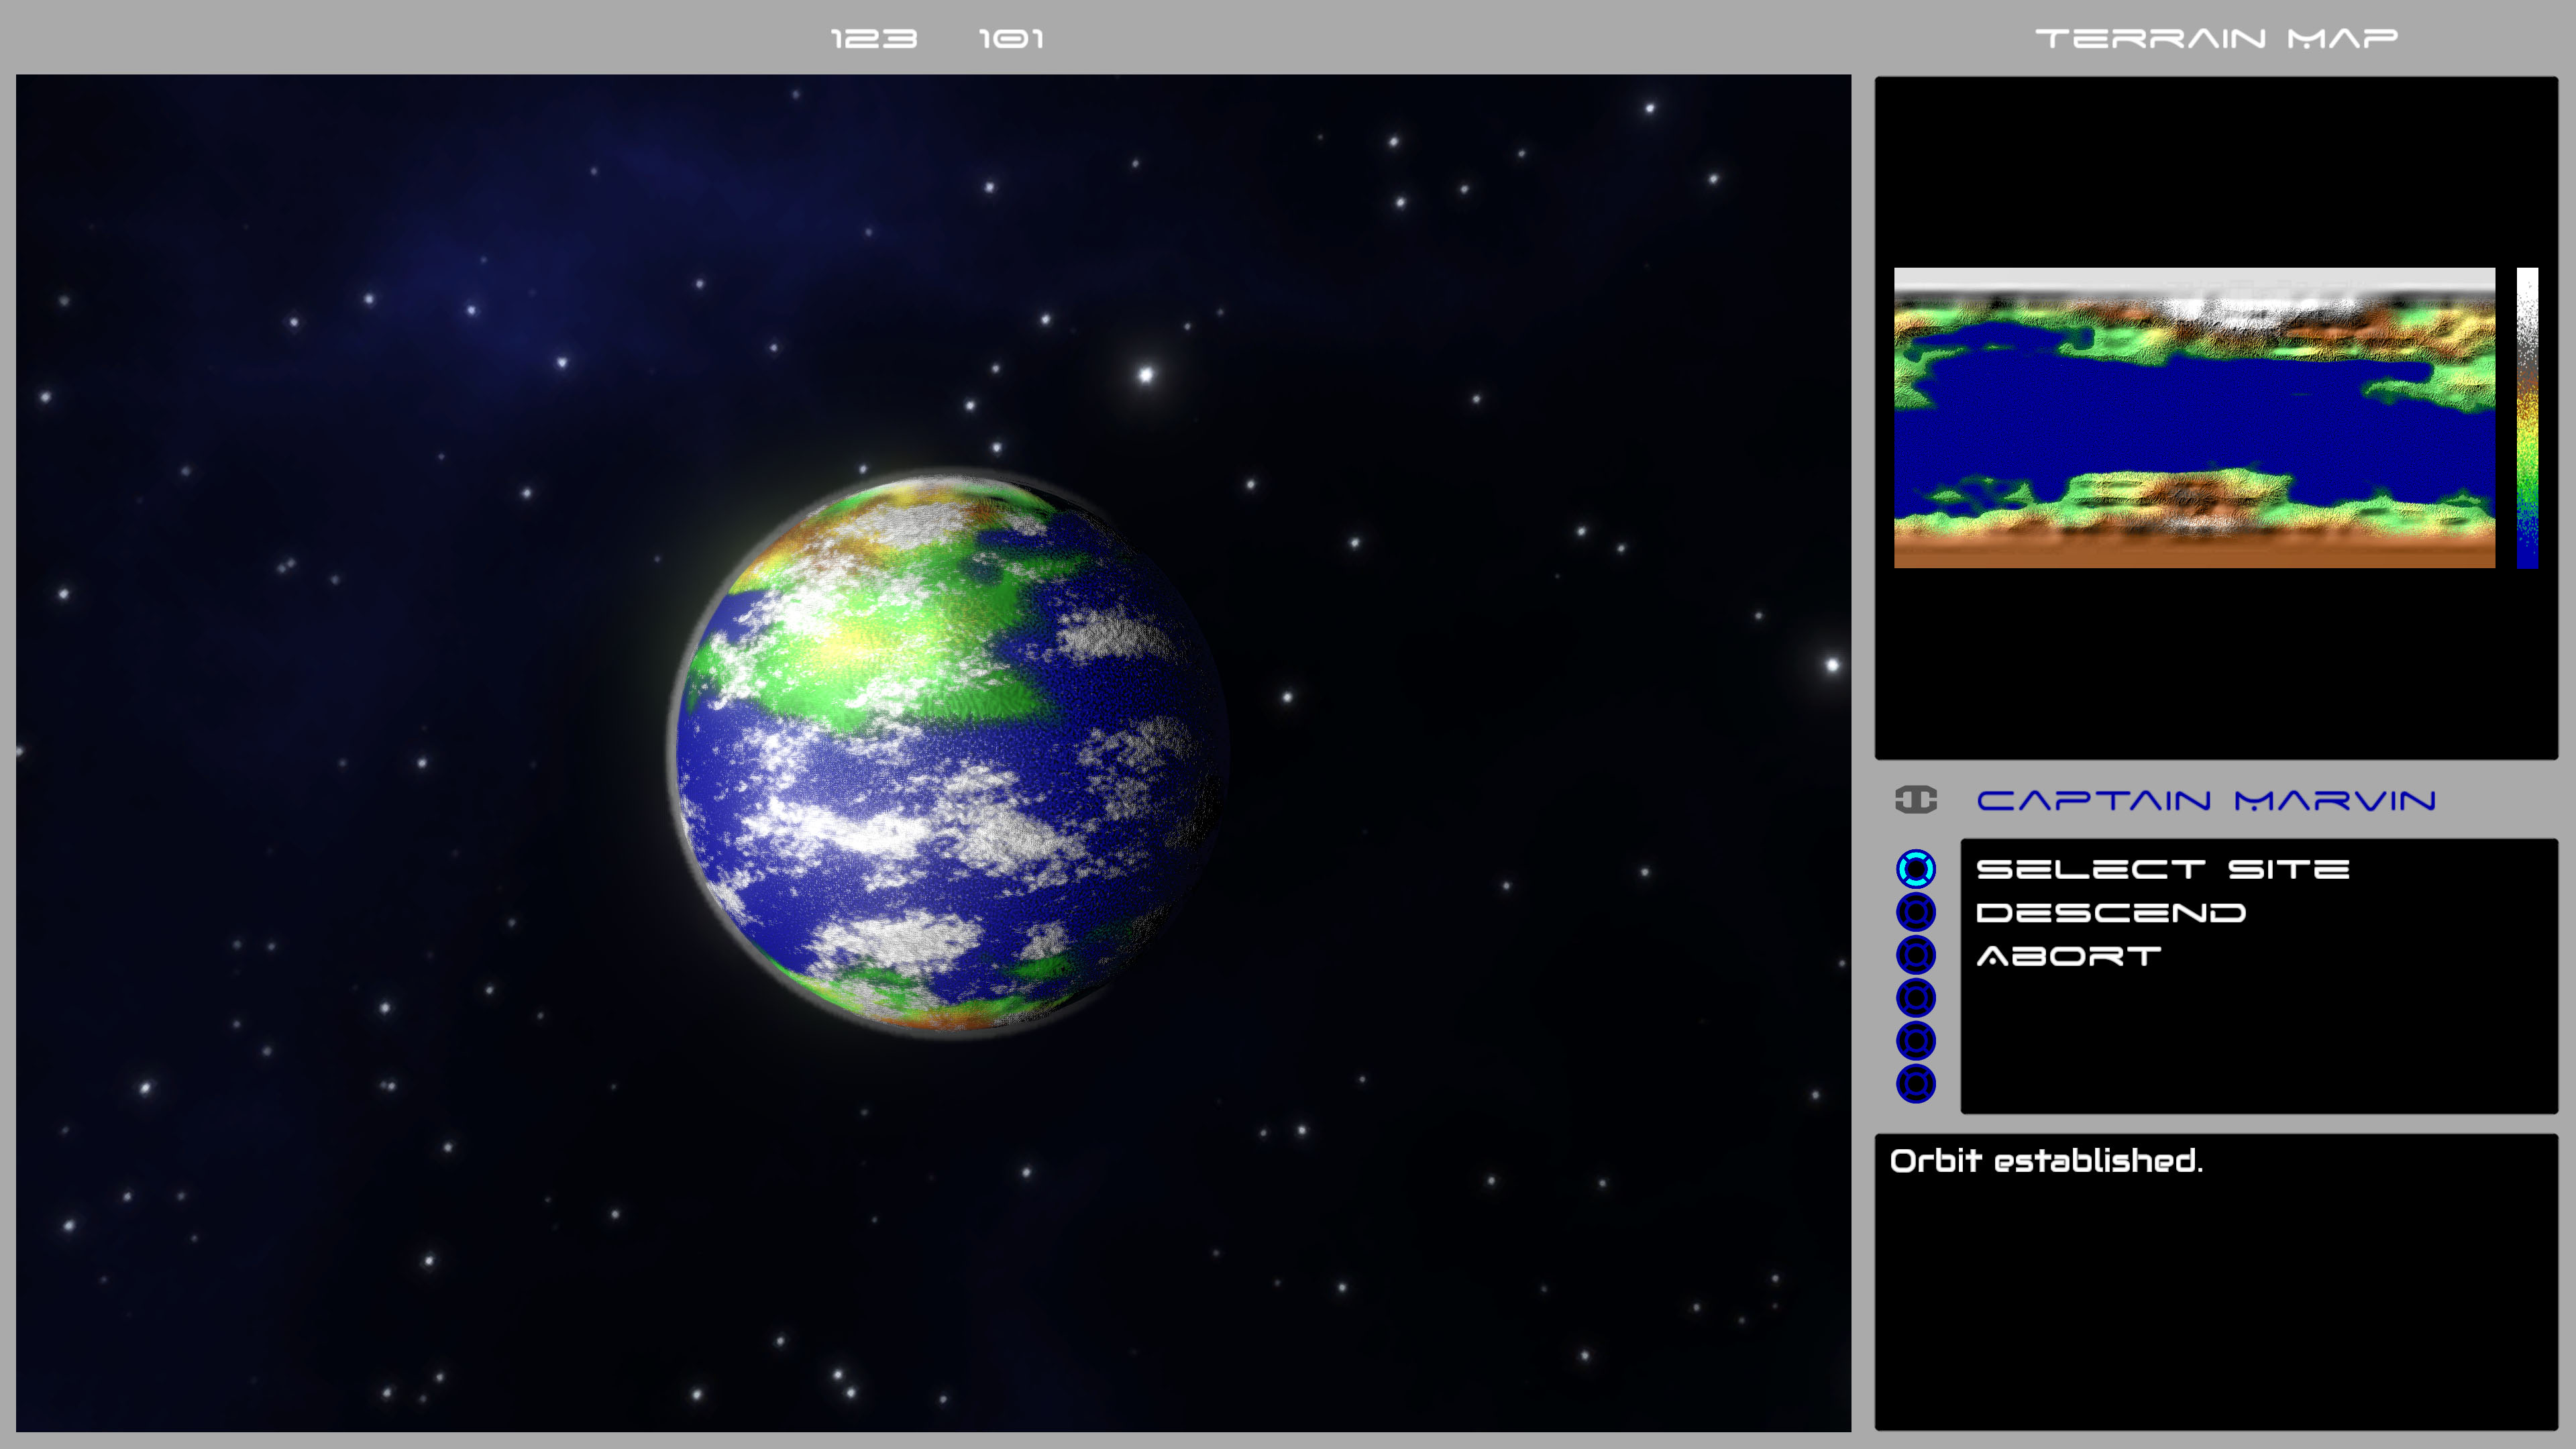
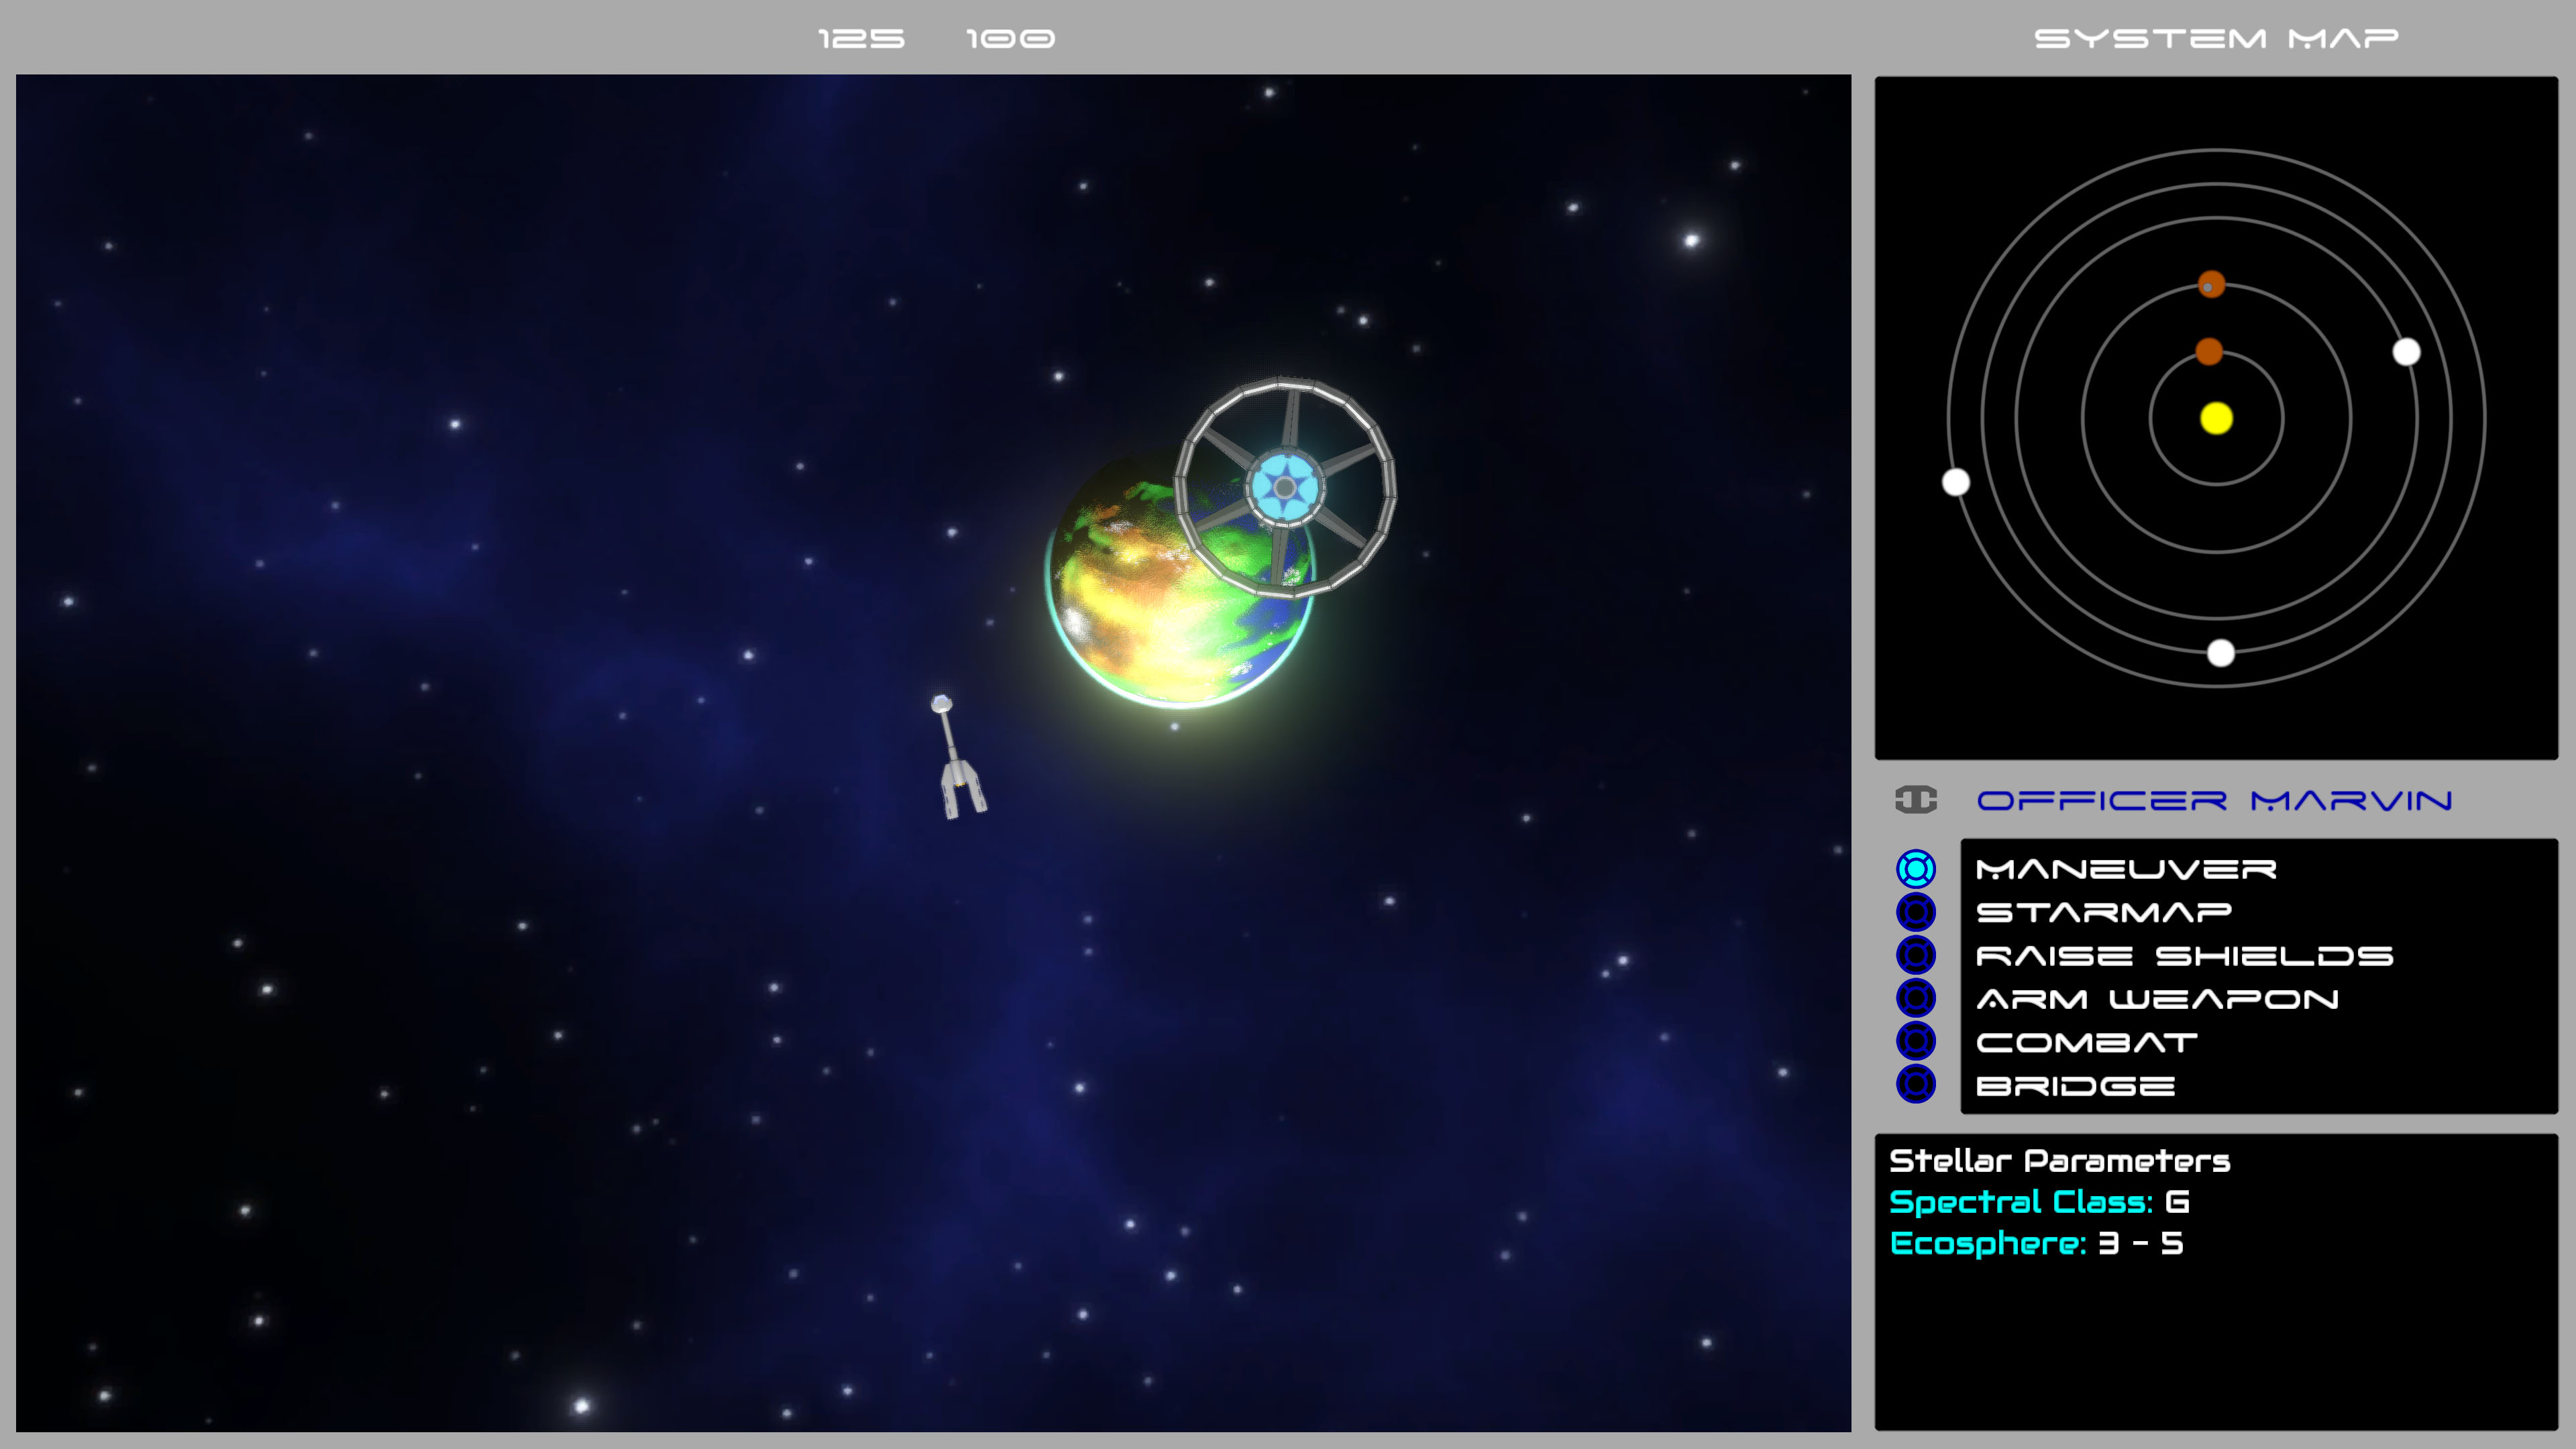
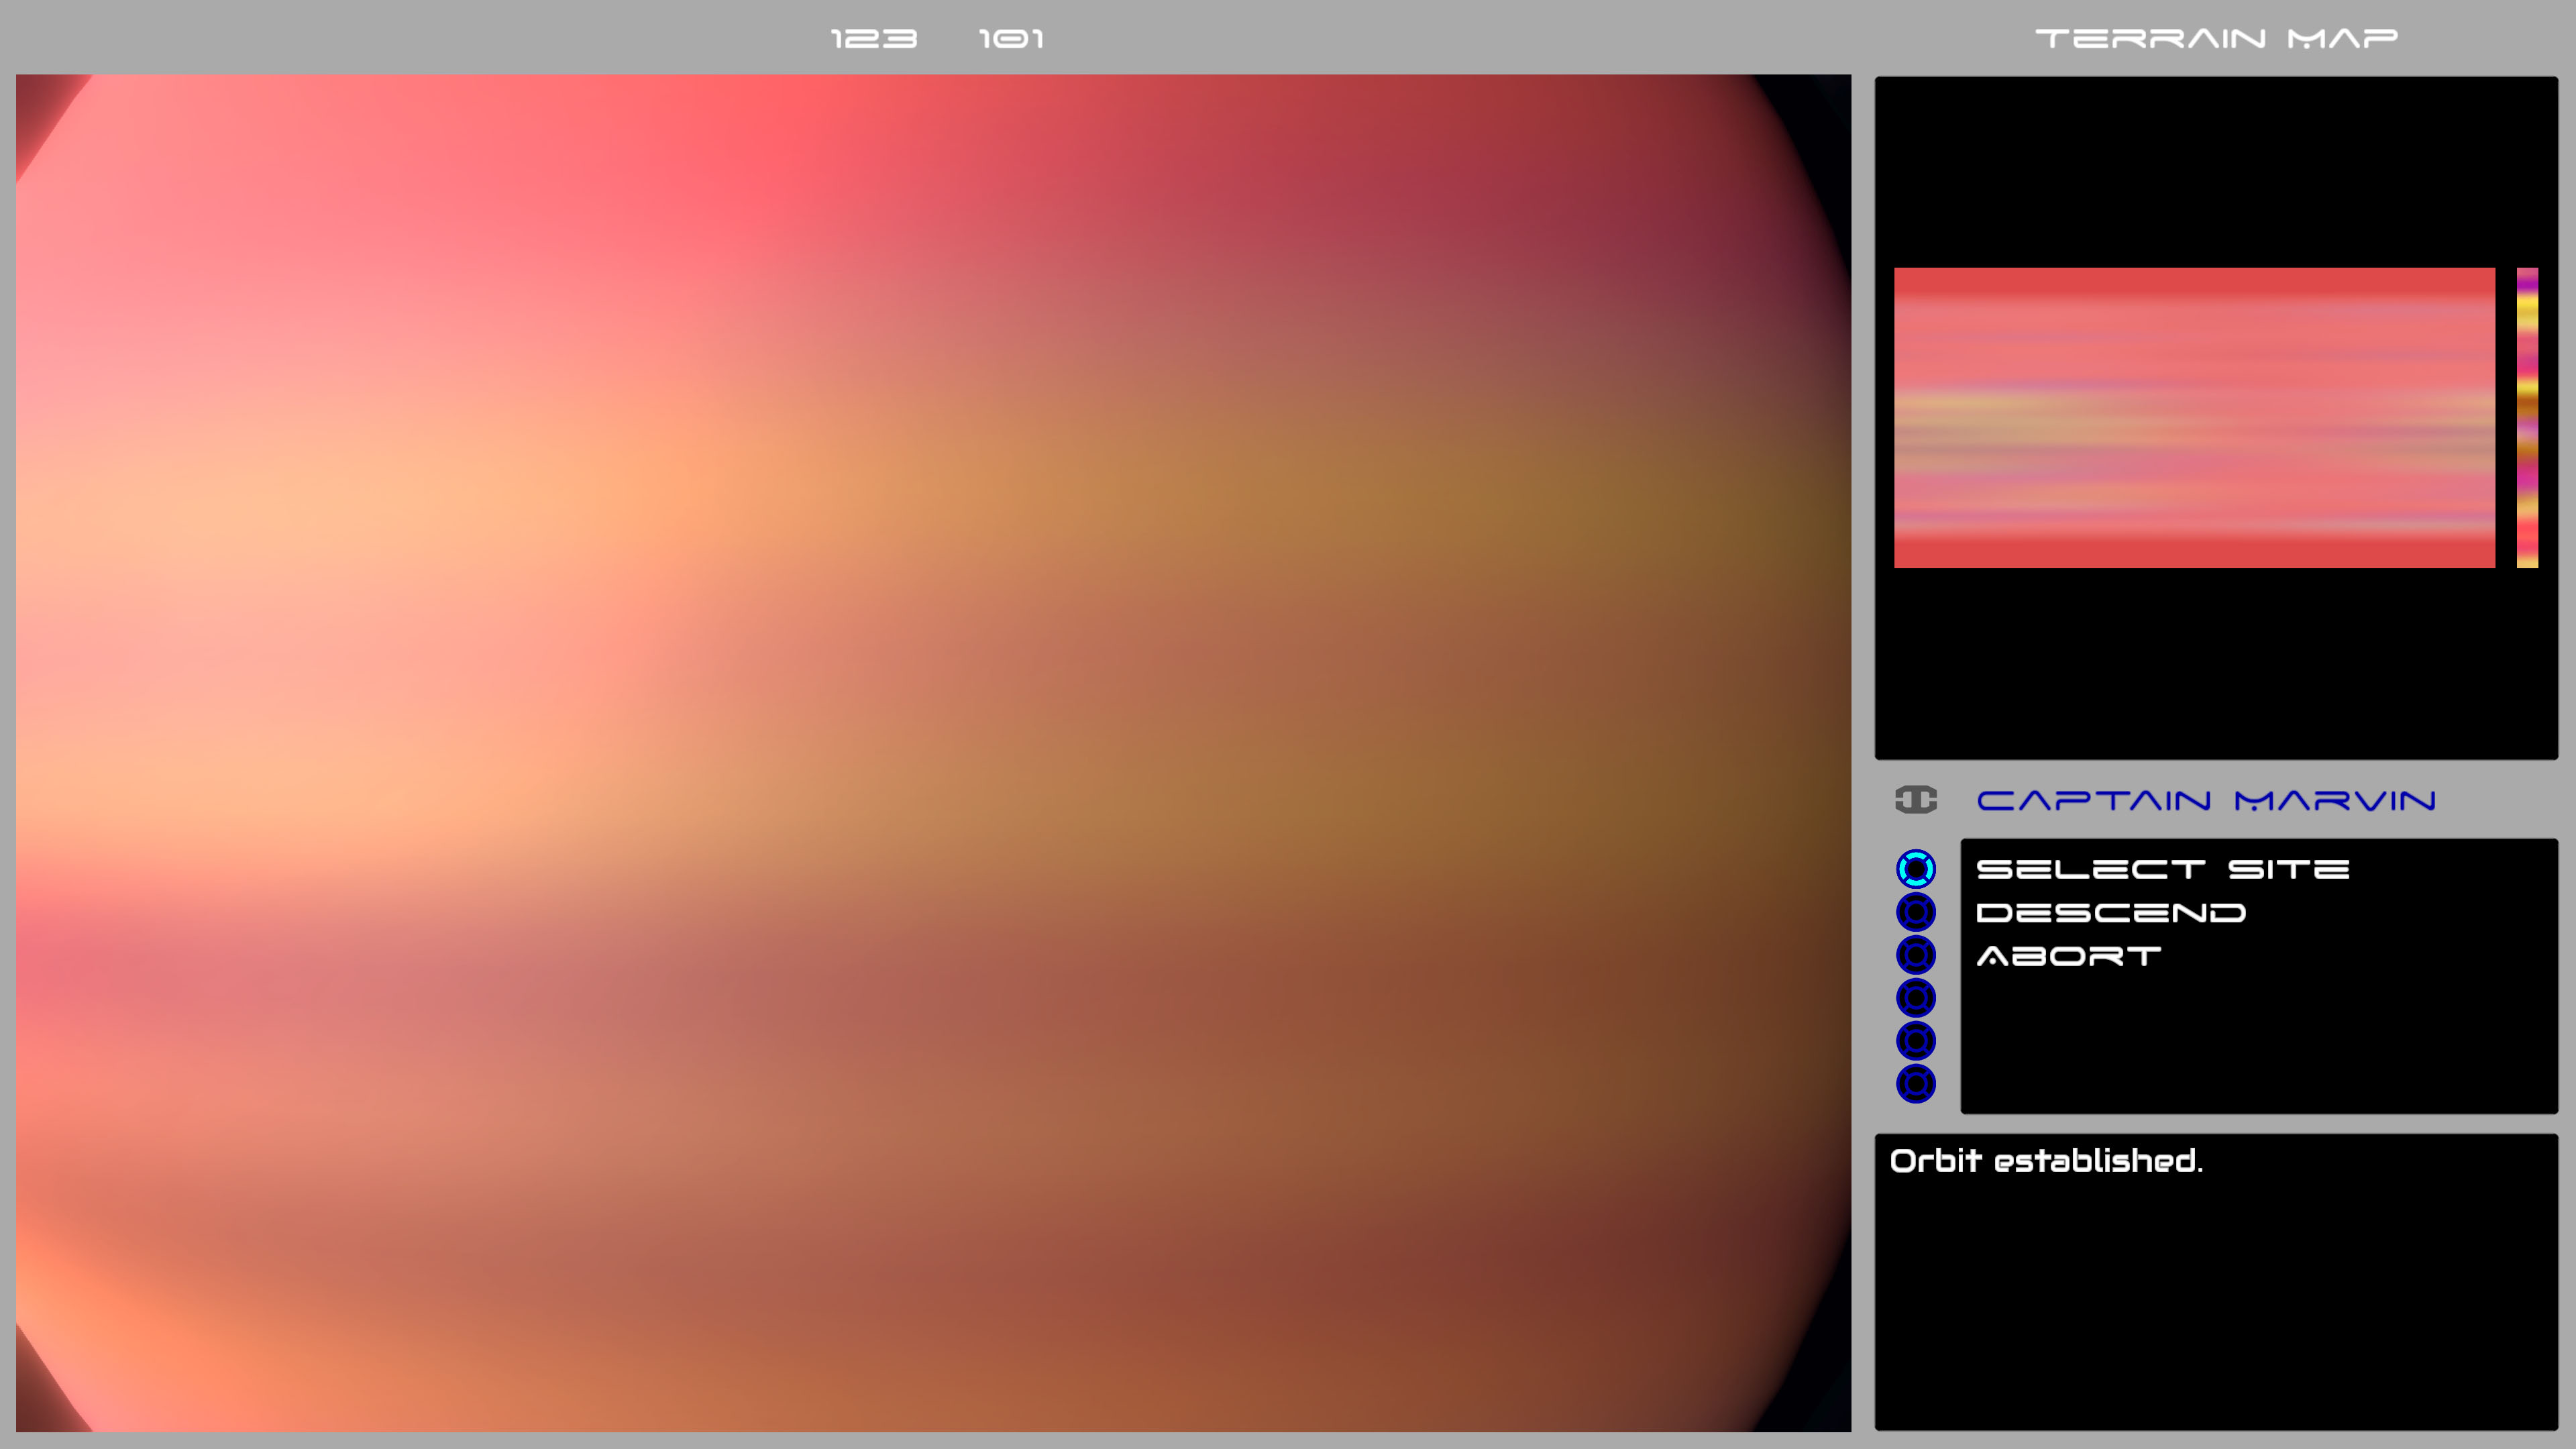
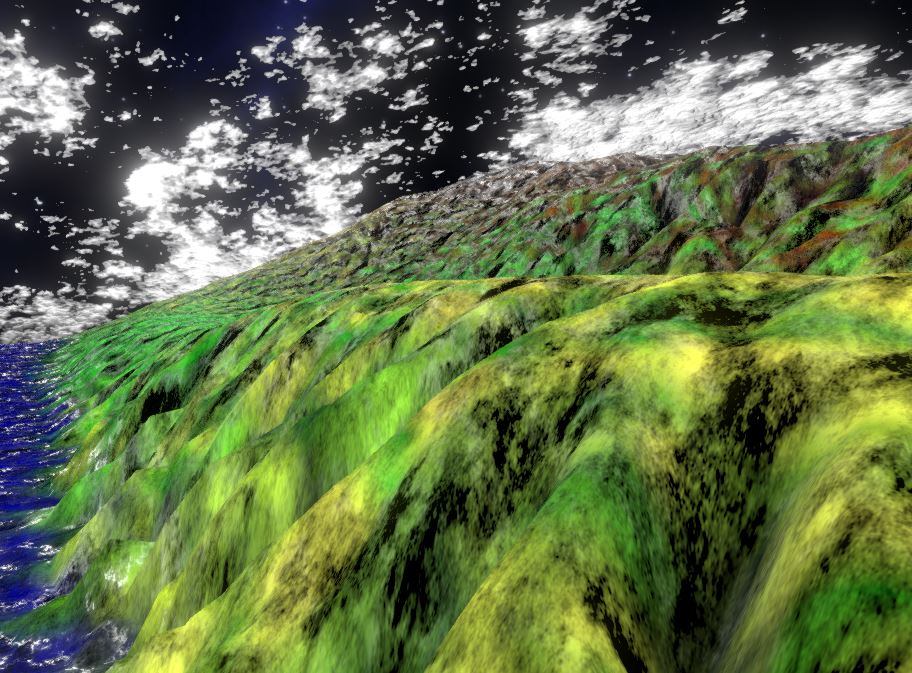
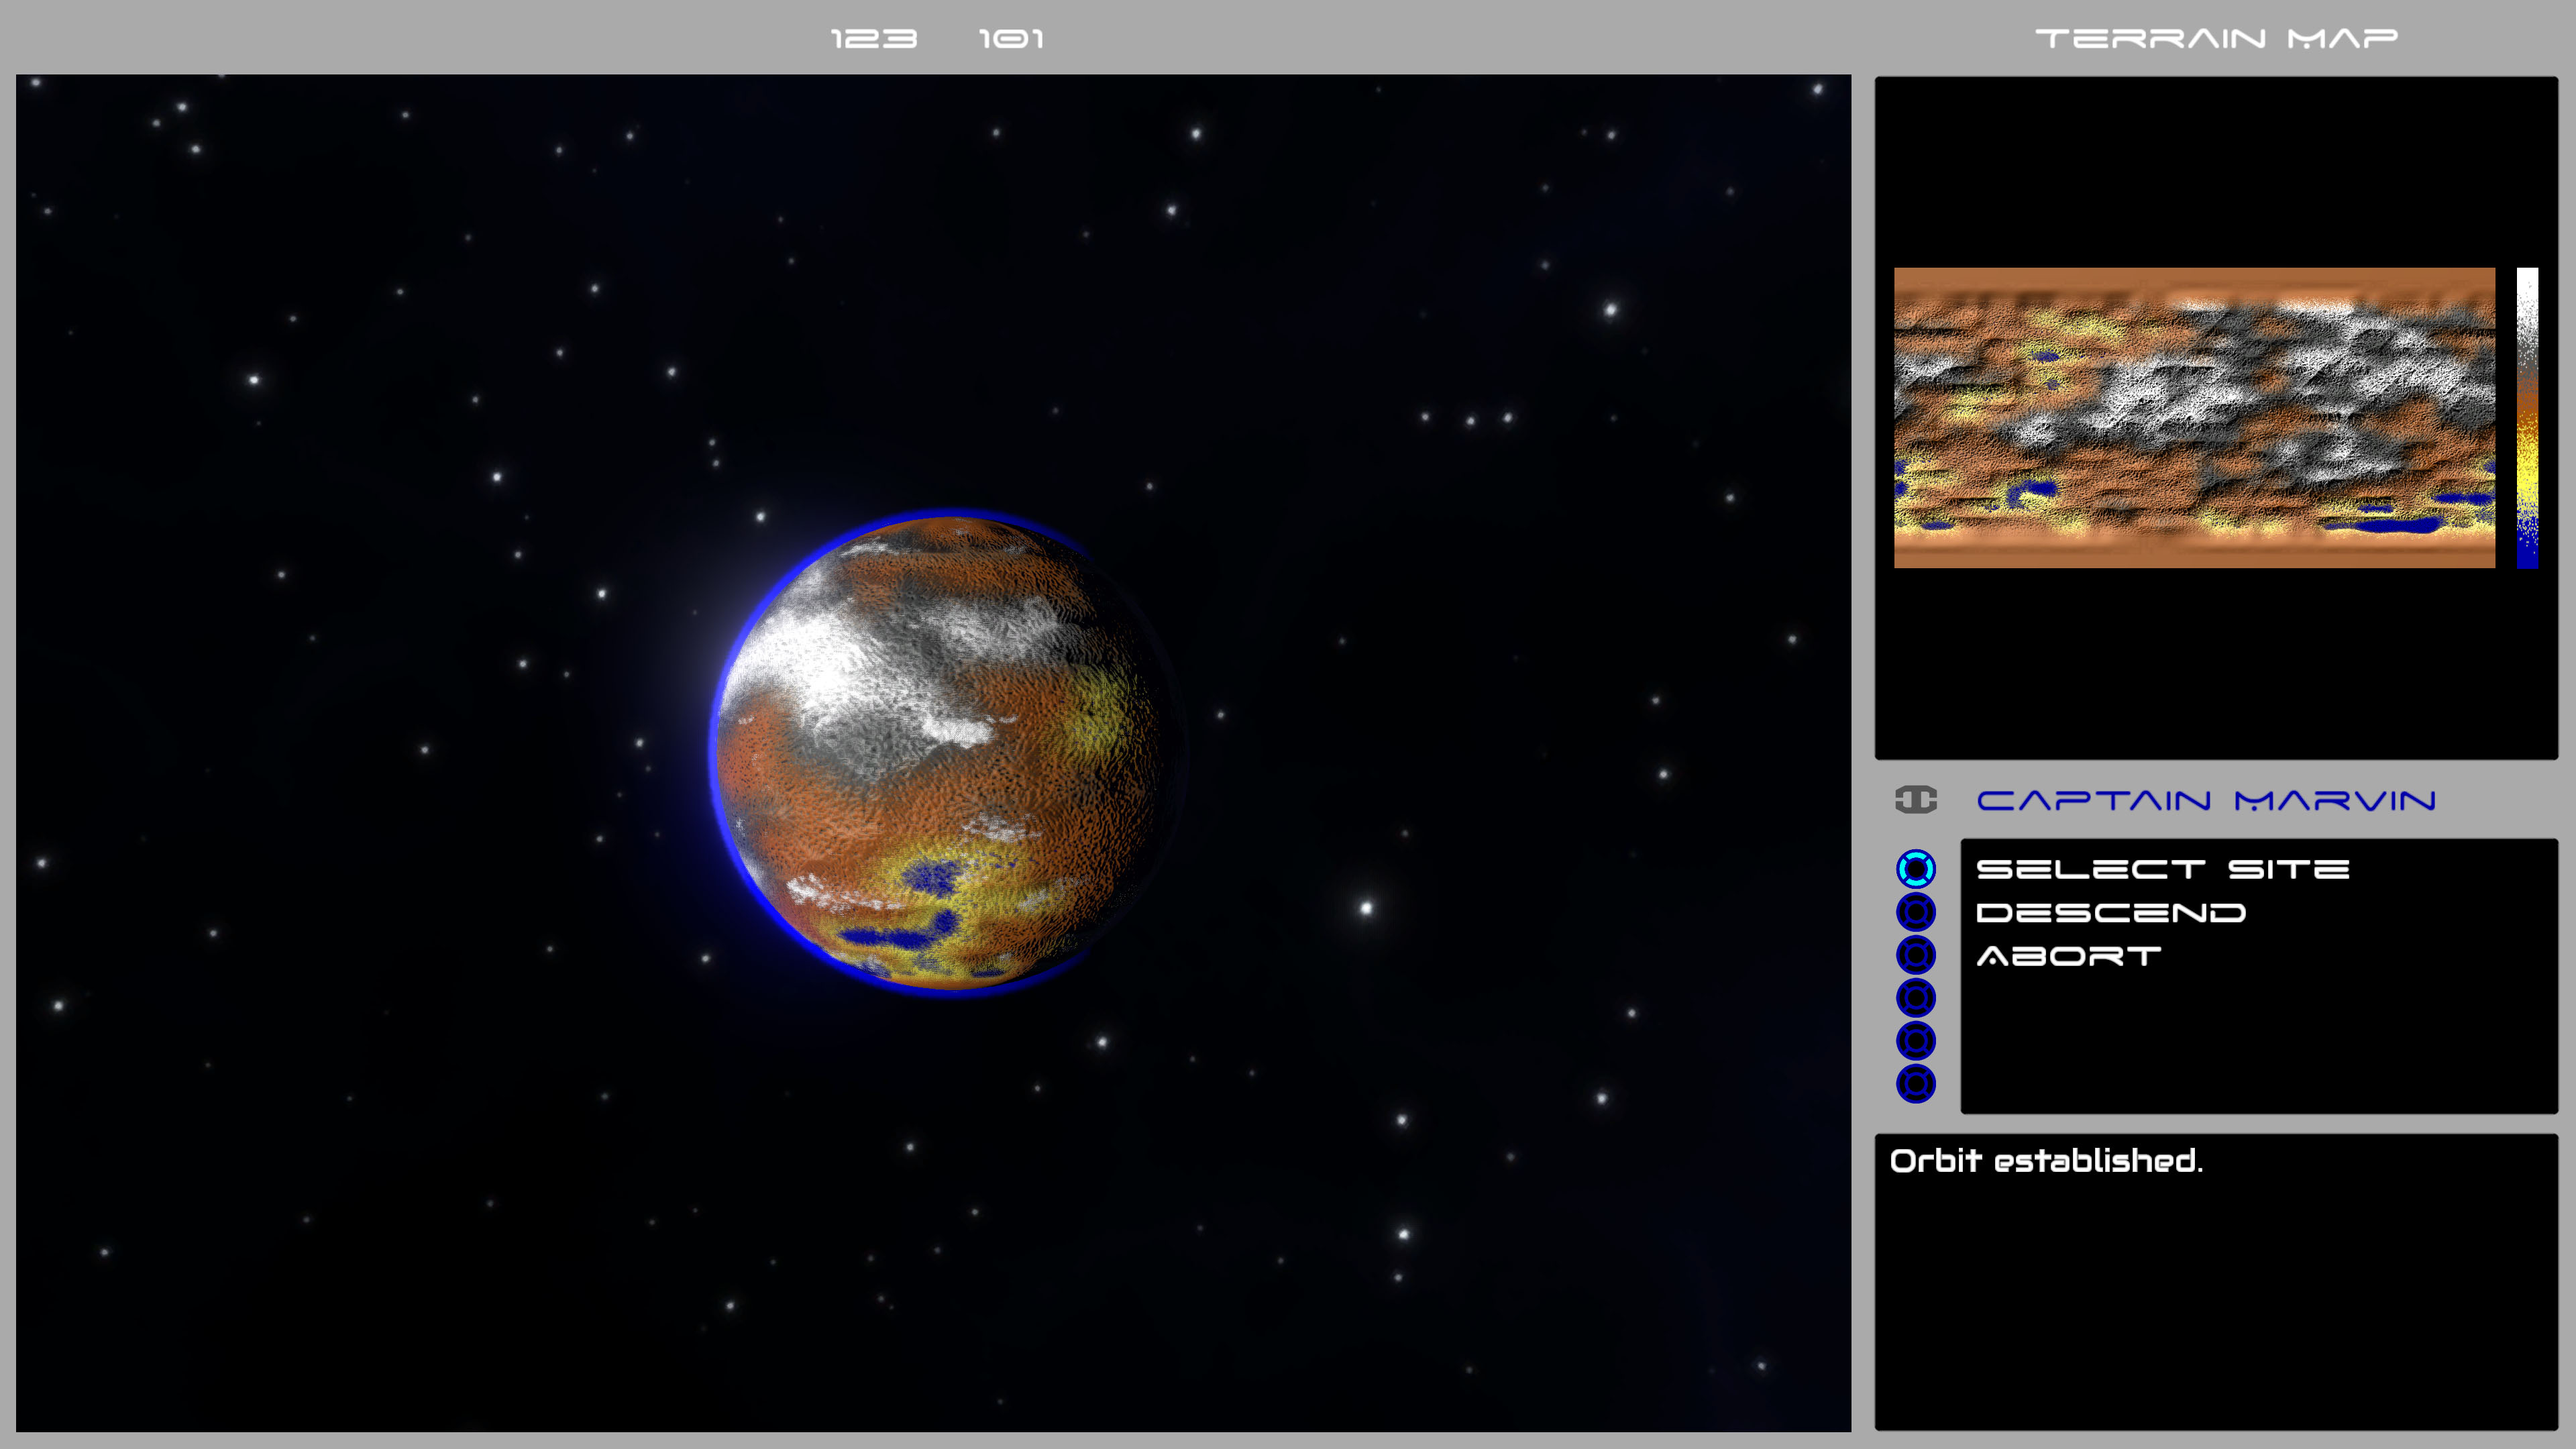
You can now land on planets in this Starflight remake!  You can’t disembark yet, but at least you can see the planets close up now!

Getting to this point was about a week’s worth of work, and it was a lot of fun.  It is still quite incomplete – here’s a list of things that I still need to do:

  • Landing sounds (retro rockets firing, atmosphere rush, screams of “we’re gonna die!”, etc.)
  • Heat shield glow and aurora effects
  • Initialize close up clouds correctly (currently, it is using the default density and color instead of actual planet’s)
  • Fade in close up cloud transition instead of popping them on
  • Skybox transitions
  • Fade out the clouds at edges of the map
  • Make the camera field of view go wider when landing

The landing animation itself is pretty close to final.  The launch animation needs a lot of love.

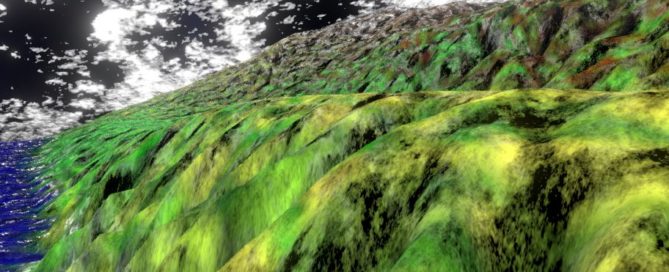
In the video, I land at several places on several different planets.  I never get tired of it – it is so pretty.  Watching the cloud shadows roll across the terrain is nice and relaxing.  Just wait until I put in weather effects.  🙂

You might be wondering why I make the camera swing away from the planet.  I do this on purpose – I needed some point during the animation to pull a switcheroo on the player – the planet sphere is actually taken away and replaced with a terrain grid.  I can’t do that while the player is staring at the planet – it’d be very noticeable and look horribly wrong.  I think once I add in the heat shield glow and the audio effects, it’ll all look and sound just right.

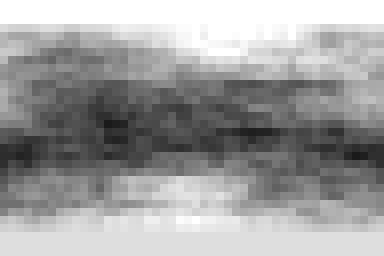
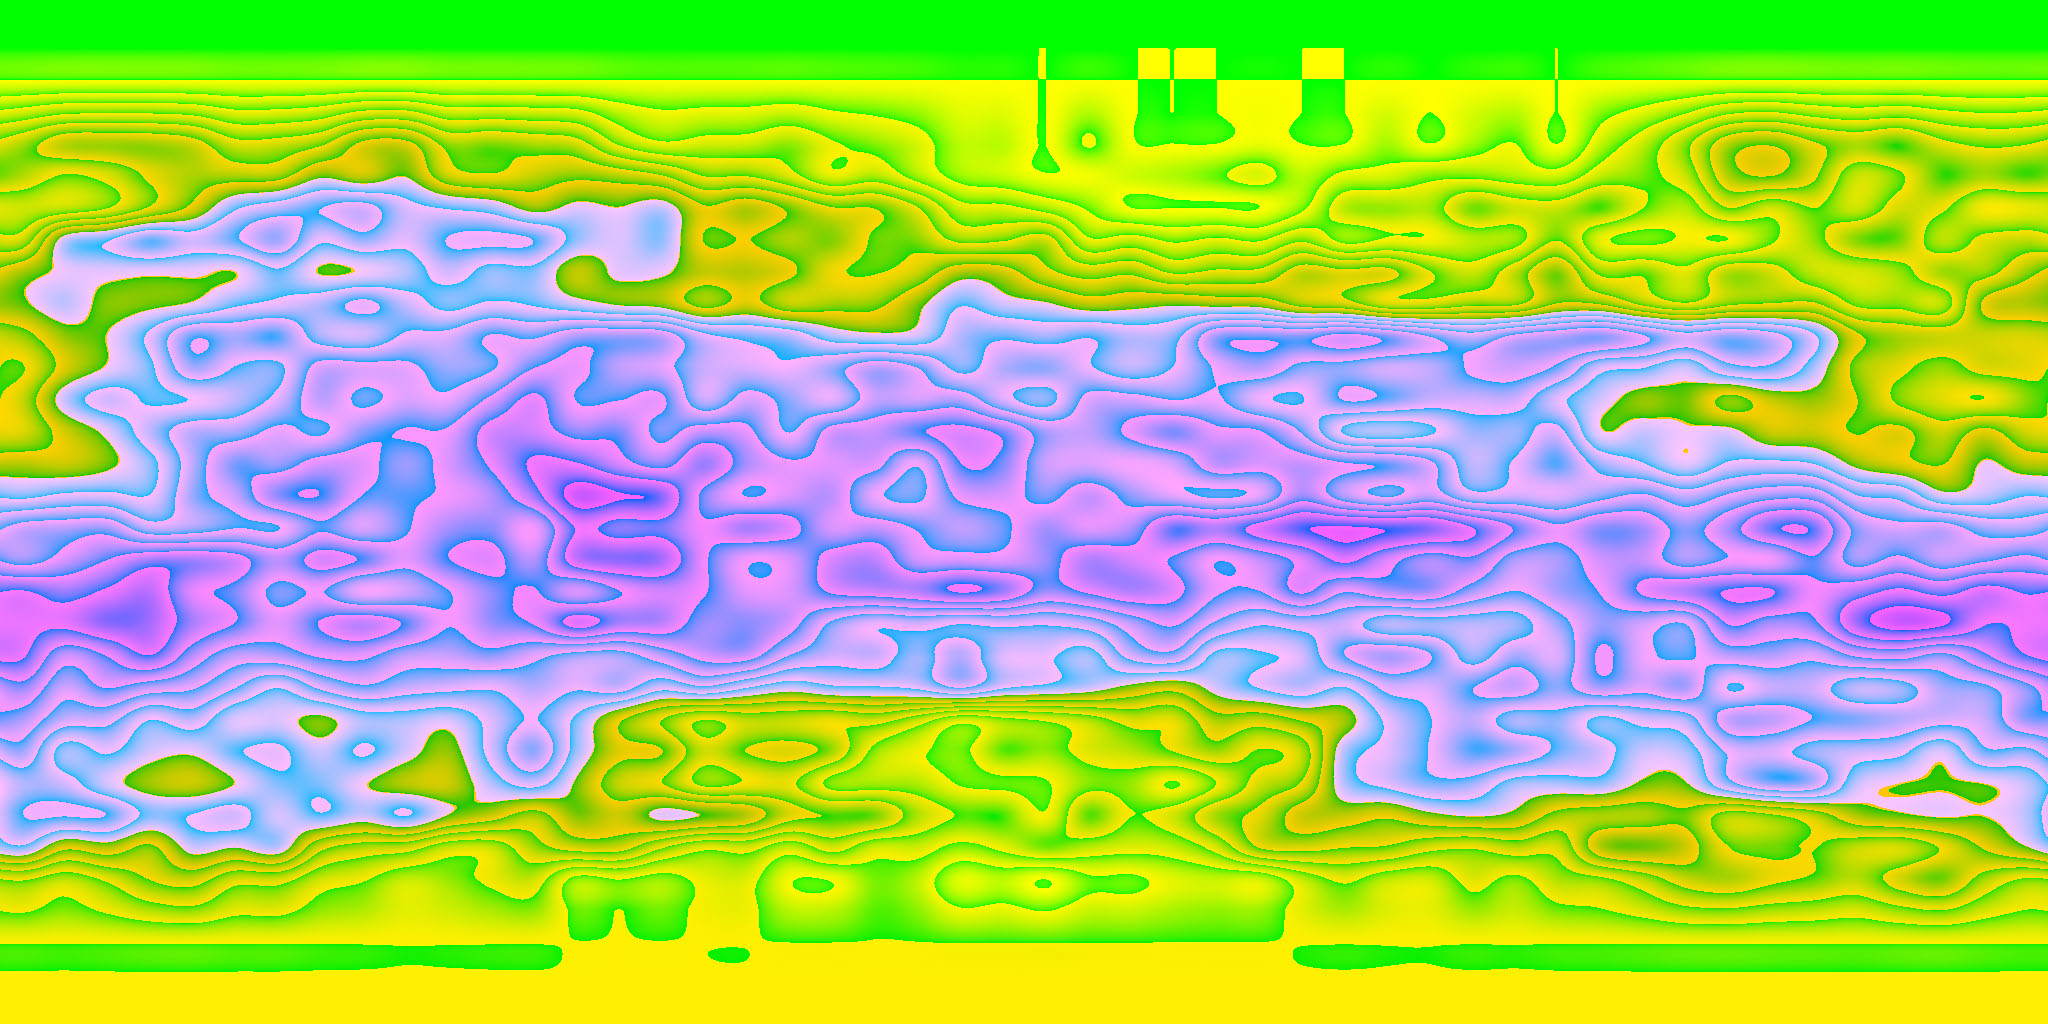
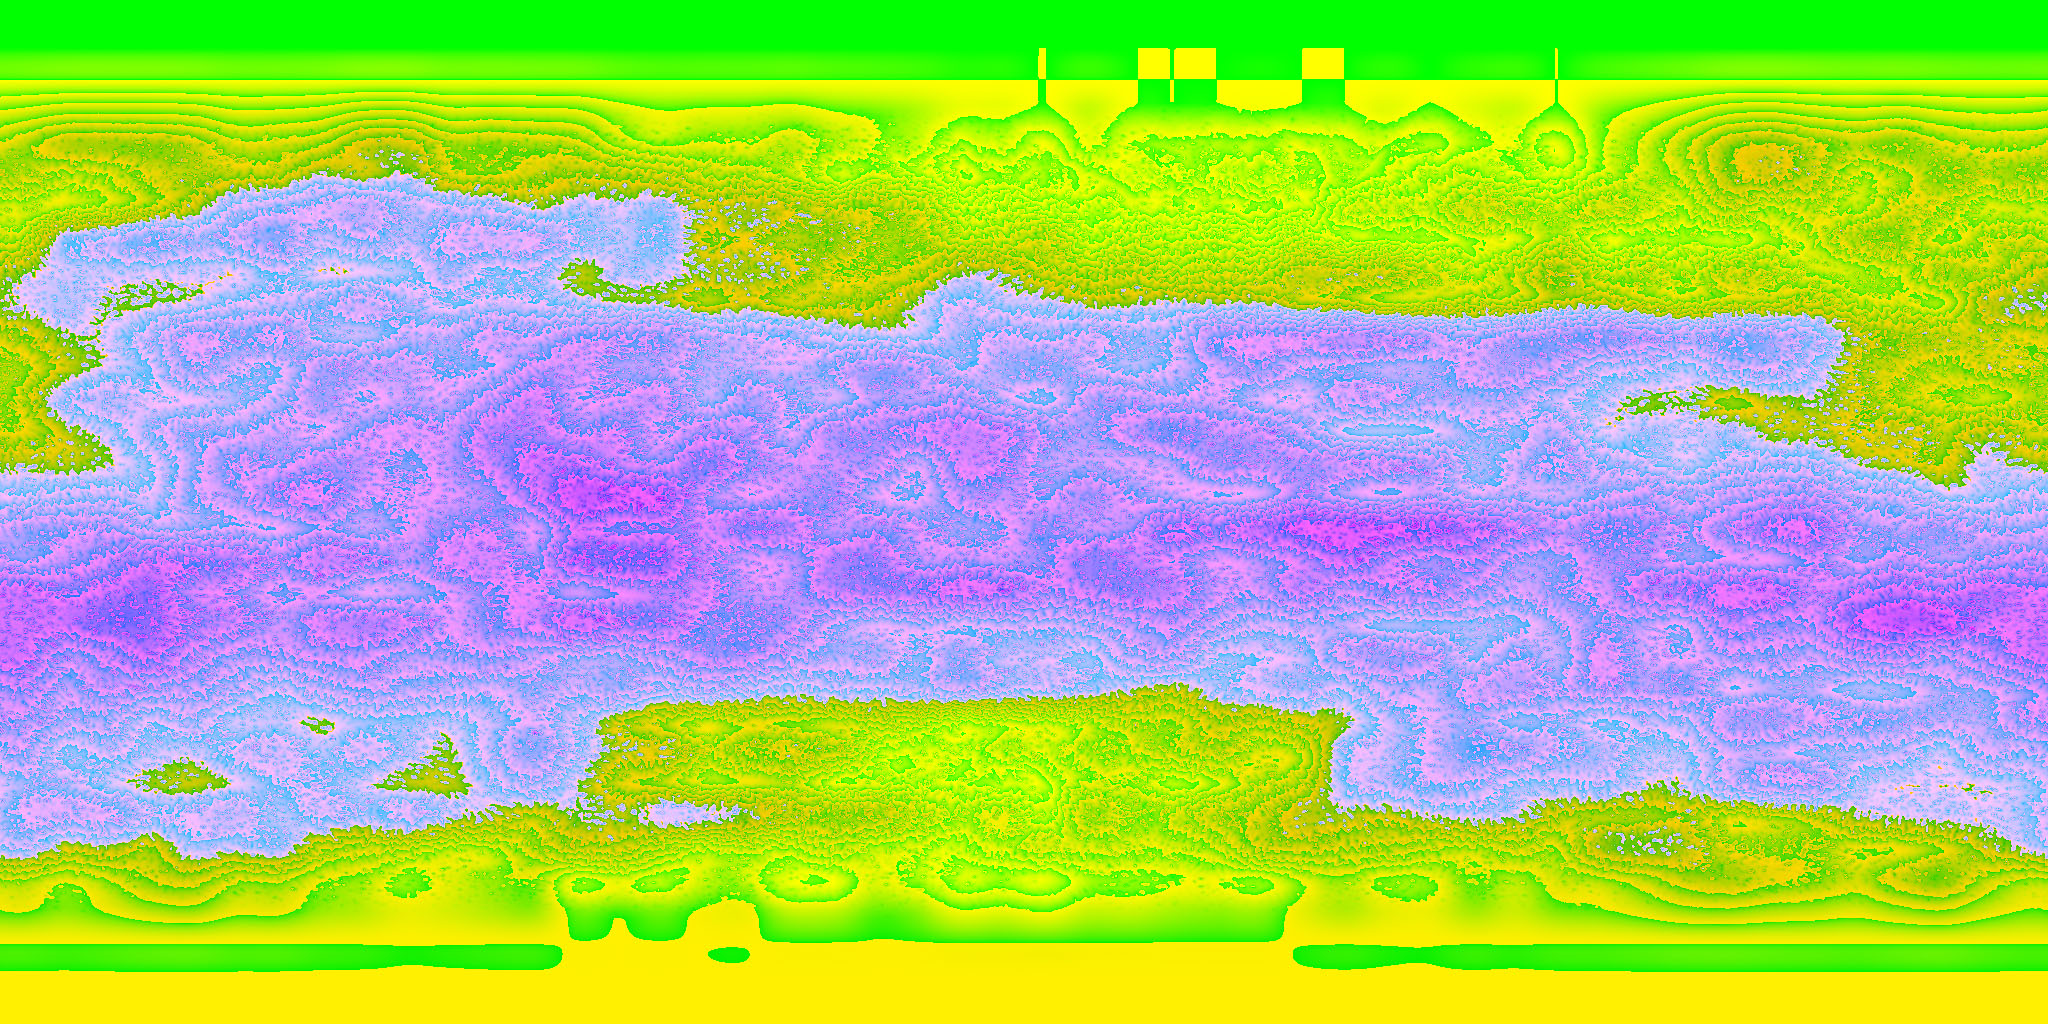
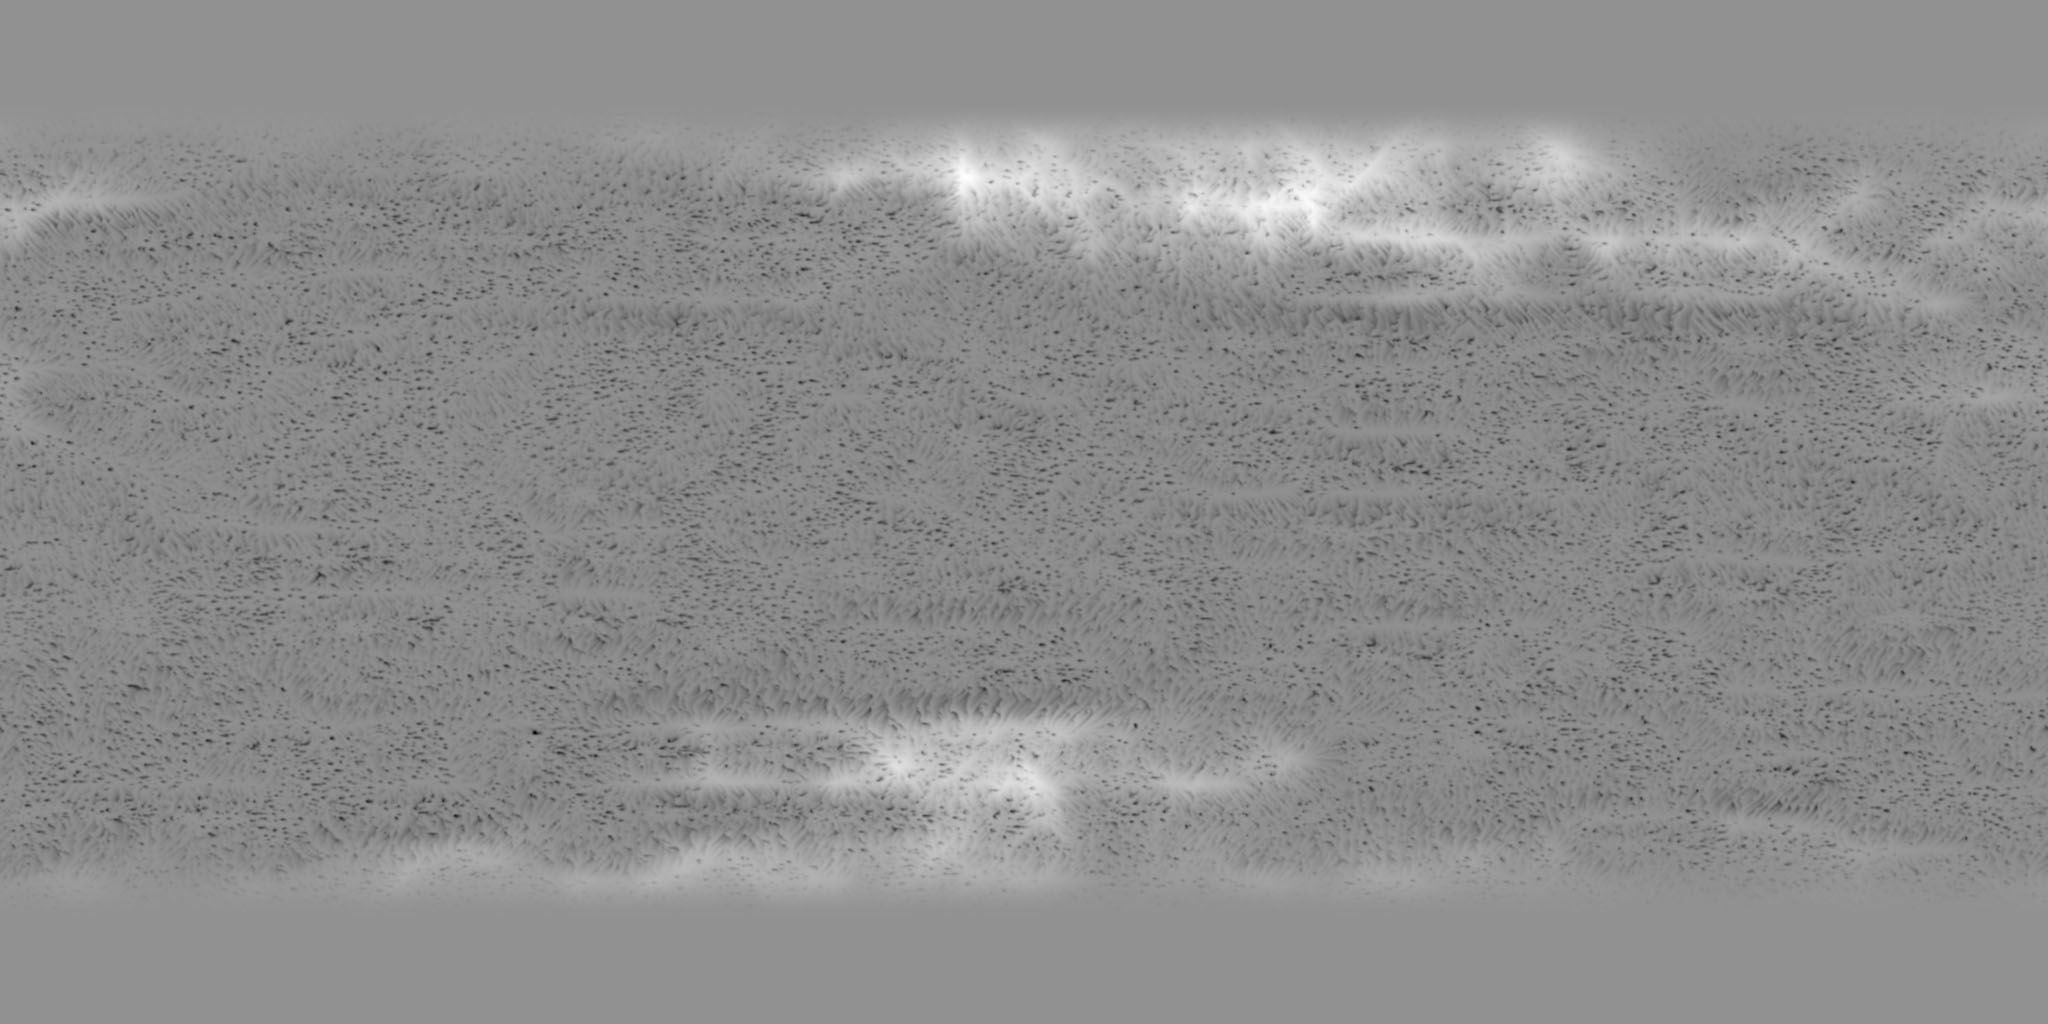
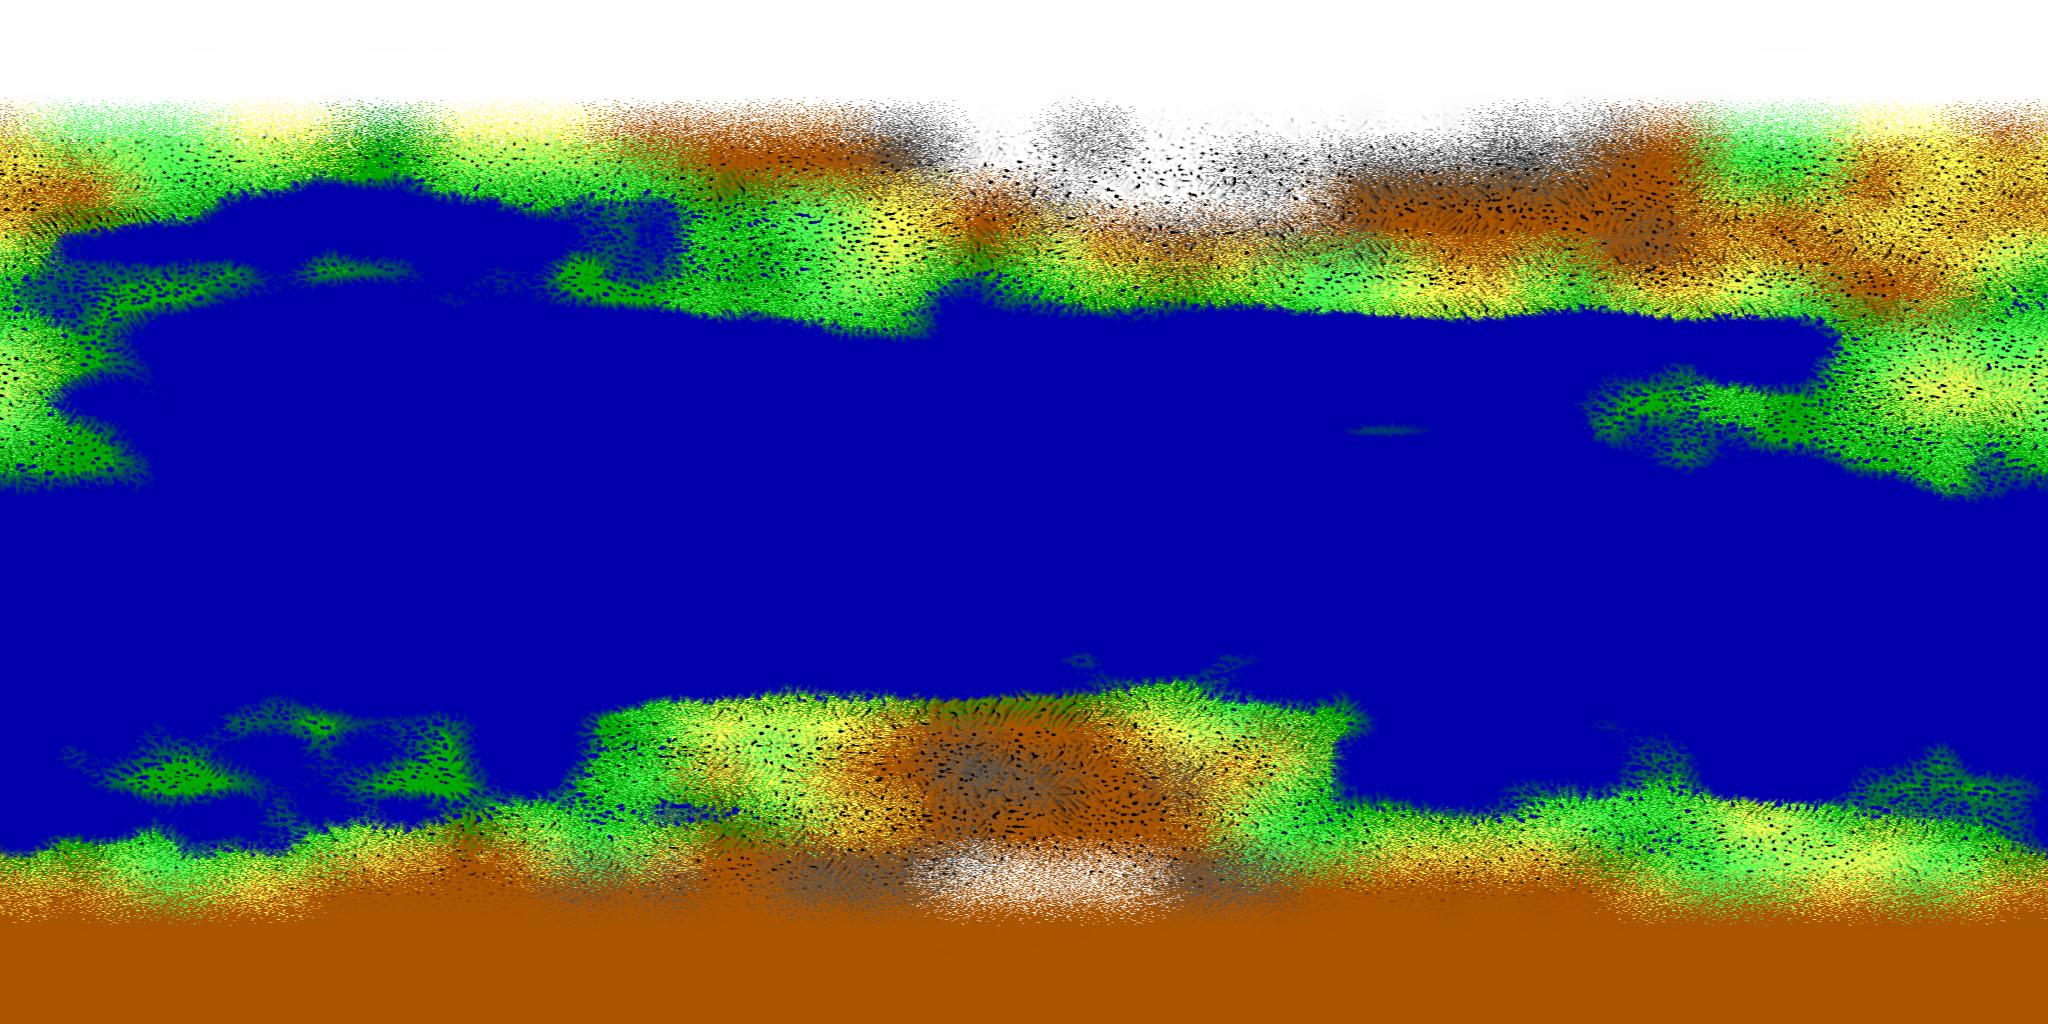
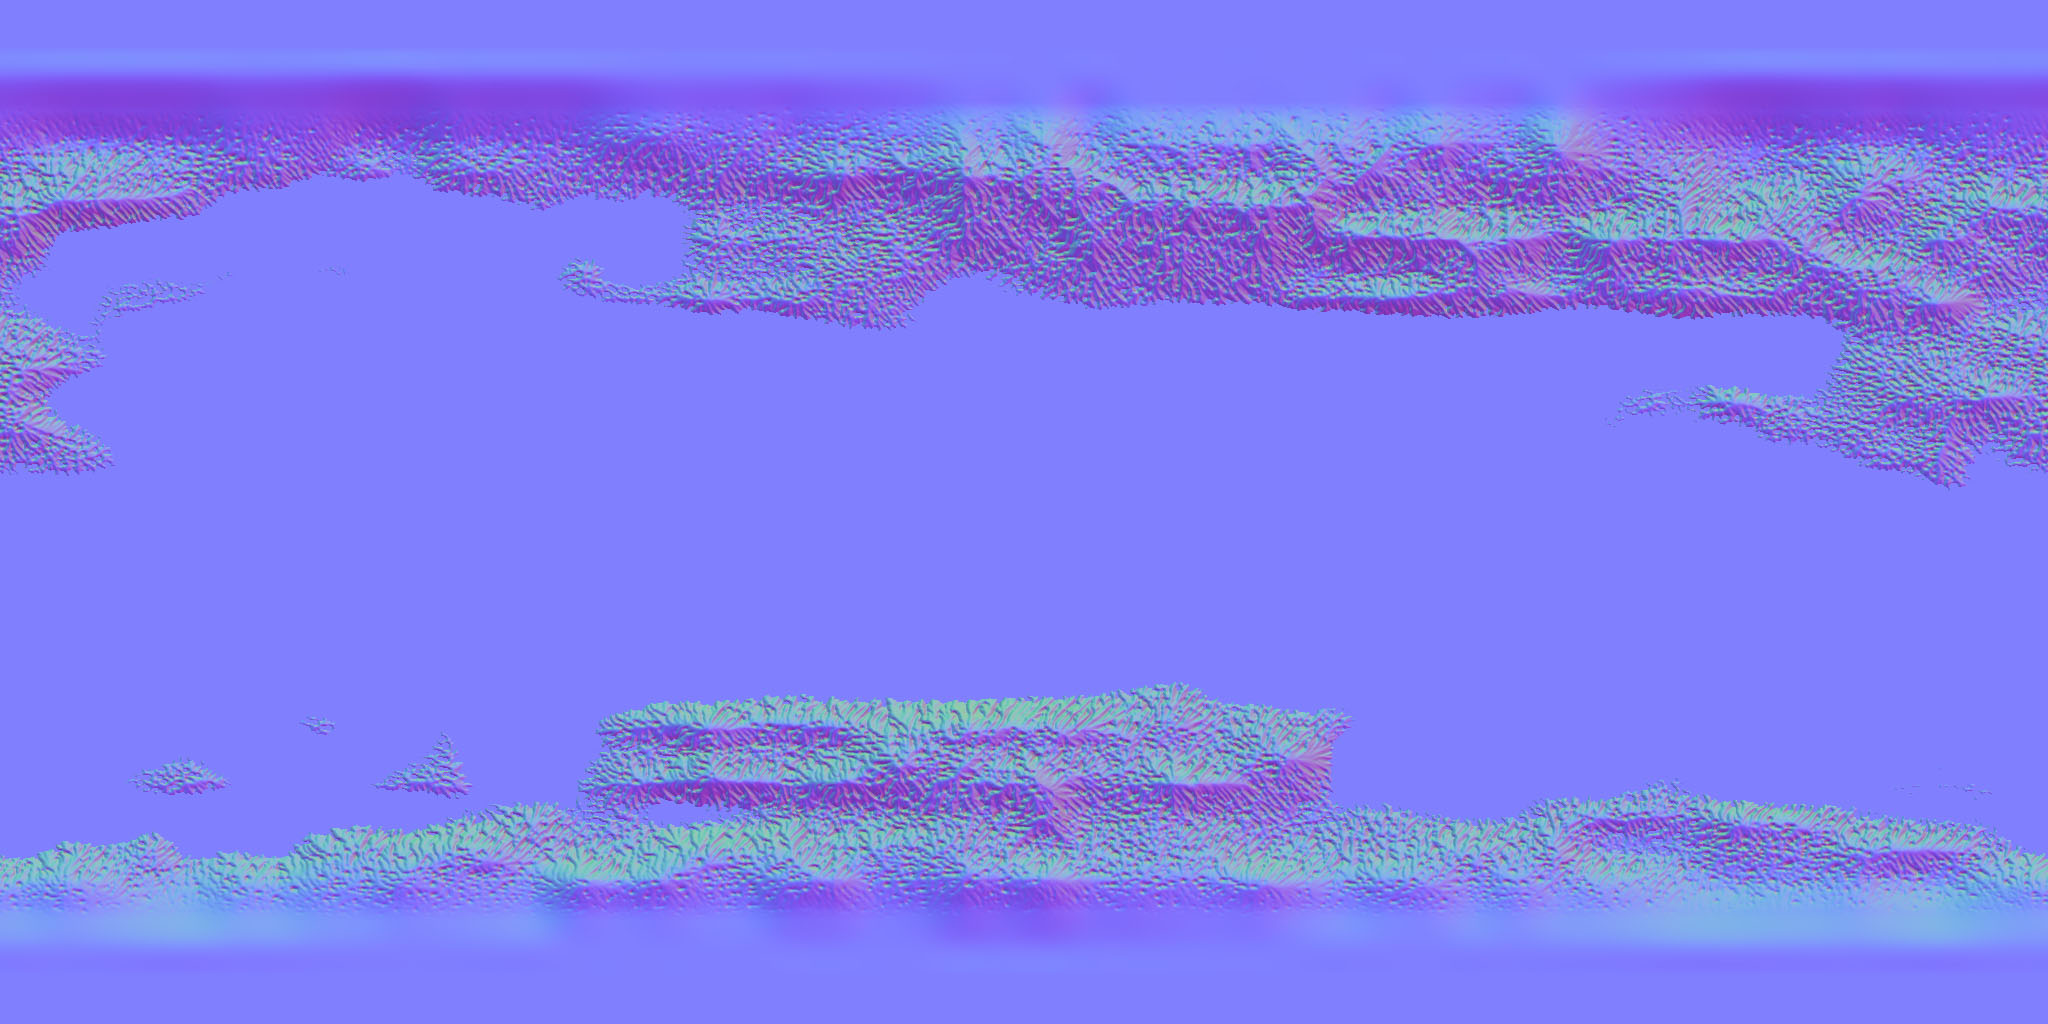
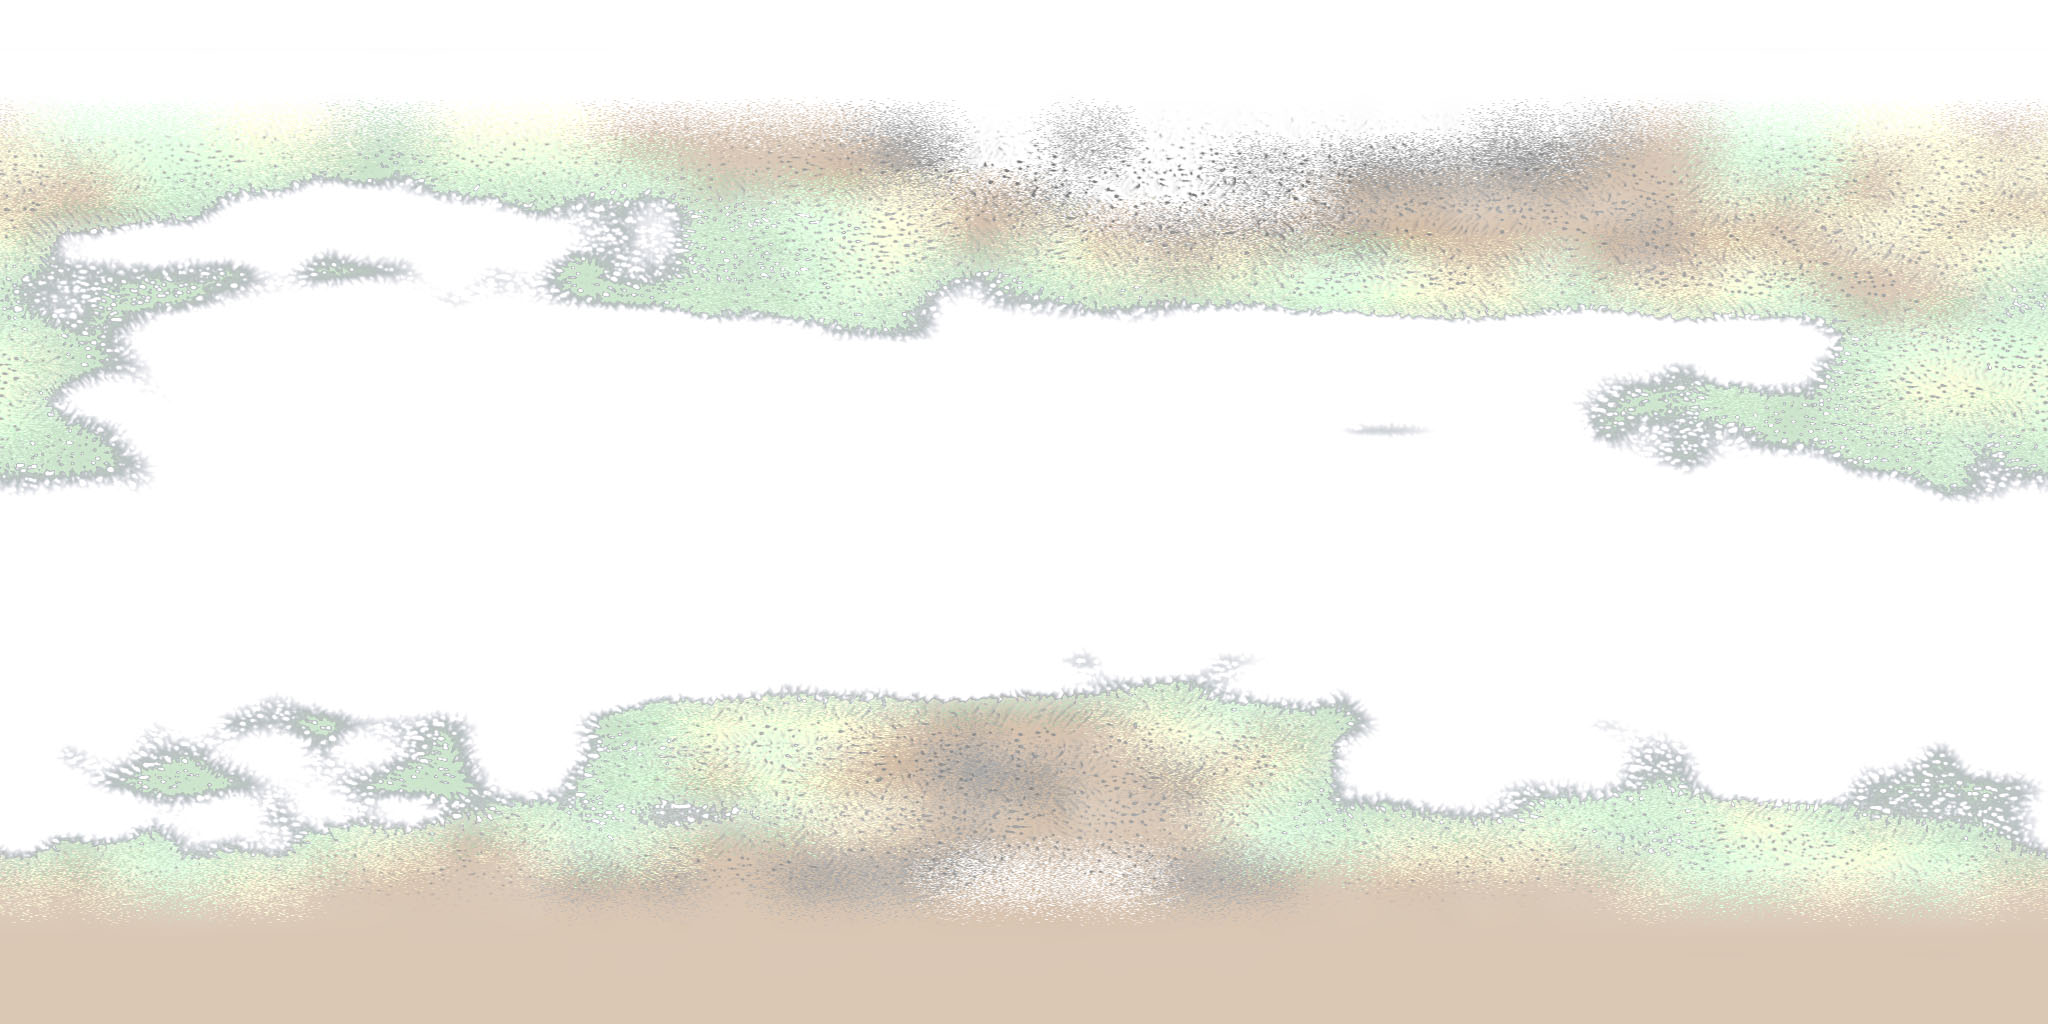
Here are some random pictures I took while working on the planet landings.  The weird grid you see is the terrain grid, and the idea is that the resolution decreases the further out you are from the center of the terrain grid.  And of course, there is the video as well.

By |2019-01-17T16:32:59-07:00January 17th, 2019|Starflight|1 Comment

Starmap

First of all, apologies in advance.  I’ve actually been quite busy adding stuff to the remake and neglecting to also make blog posts about them.  So, today will be a catch-up day.  You should expect 3 blog posts (including this one) in my effort to catch you all up on the latest and greatest.

Michael begged me to add in the Starmap feature so he doesn’t get lost in space.  Fine, I said!  🙂

So now we have a starmap feature that is sort of incomplete.  In the original game, while moving around the starmap it would calculate the amount of fuel needed to get to the location you are looking at.  I don’t do that yet.  Also, in the original game, the starmap would automatically add in flux entry and exit points, which I don’t do yet either.  Other than that, the starmap is fully functional.

So these are the things I need to do before I can say this starmap feature gets my stamp of approval:

  • Add in fuel cost estimator
  • Add in flux entry and exit points as they are discovered
  • Reduce the sensitivity of the directional controls (change acceleration curve)
  • Change the purple dot representing your ship to something better

Here is a video of the starmap in action:

By |2019-01-17T15:44:15-07:00January 17th, 2019|Starflight|5 Comments

Better Planets!

When I woke up on the morning of January 2nd and checked my email messages, I found a nice present sent to me by Sebastian Macke.

But first, who is Sebastian?  He is the guy behind the Starflight reverse engineering project that you can find here on GitHub.  I stumbled across this project while looking for data relating to Starflight in November and immediately reached out to him to see if he could help me out.  This project is awesome – he basically created what is essentially a Starflight decompiler that will take the Forth bytecode from the binary program, and convert it to C code.  Unfortunately, he is not far along enough in his project to be able to give me the information I needed, as many of the function names are still obfuscated Forth command words.

Fast forward to today.  In the email, he wrote that he was able to gain access to the fractal planet generator in the original game!  He went ahead and generated the raw height and color map for all 811 planets in the game, and sent them to me.  What a nice surprise!  The height maps he had sent me were of much higher fidelity than what I was able to extract from screenshots of the game.  So, obviously, I had to incorporate this treasure into the fractal planet generator that I had developed for the remake.

You might want to refresh your memory at this time – go ahead and visit the original planet generator post here: https://bravearmy.com/starflight/2018/10/01/final-planet-generator-non-gas-giants/

Okay, so the first step was to bring in the height and color maps that Sebastian made:

Original Maps

Note how there are smooth transitions in the grayscale height map which is the top half of the image?  There are so many levels in that greyscale map.  Compare that to only 6 levels in the color map in the bottom half.

The next step is to add some padding to the top and bottom of the map to avoid the pole pinching issue, as was described in the original planet generator post:

Prepared Height Map Prepared Color Map

Now, here we do something a little differently compared to how we were doing it with the original planet generator.  Because of the low fidelity of the original elevation data, I had to come up with a custom way to scale the maps up – creating a “contours” pass and a specialized scaler.  Now with the higher fidelity elevation data, we do not need to do any of that.  Here, I just use standard bicubic (Hermite) scaling to bring the elevation map to 2048 by 1024 resolution.

Below is an image of the elevation data but colorized so it is easier to see the fine details.  It is really hard to see details in a straight grayscale map.  In these images I use the green channel for the straight elevation, the red channel is the elevation wrapped around 16 times to show banding, and the blue channel is “on” where the elevation is below the water height, and “off” where it is above.

Bicubic Scale

Next, I create the mountains the same way as I previously did with the original planet generator.  Very little has changed – it’s the same mountains generator.  I build the mountains above the water level, making the mountains bigger in the higher elevations.

Now, I run the hydraulic erosion simulation process.  Again, nothing has changed here… its the same process with the previous planet generator.  Now we end up with this elevation data:

Hydraulic Erosion

Now that I have the final elevation data, I generate a “difference” map which is the difference in elevation between the bicubic scaled elevation data, and the final elevation data.  This allows me to store high fidelity elevation data at in far less space compared with saving out straight floating point data.

Difference Buffer

Finally, it is time to create the actual game texture maps from this elevation data.  I have much improved this part of the process.

First, the albedo (color) map.  Instead of translating the elevation directly into colors, I use a dithered version of the original color map.  This allows for more variation in the coloring of the terrain.  Secondly, (and this is new) I bake in the ambient occlusion into the albedo map.  What is ambient occlusion?  Basically, it is darkening the parts of the map that gets less light, such as where there are creases or valleys.  I think this made a huge improvement to how planets look.  Finally, I color the map where there is water.  The water coloring process is also different and much improved as well.  In the shallow water areas, I allow more of the soil and mud to show through.  I could not do this with the old elevation maps because I had no elevation data below the water level.  Here is the result:

Albedo Map

Here is the normal map generated from the elevation data:

Normal Map

And the specular map:

Specular Map

And the water map mask:

Water Mask Map

Put it all together and we get this…

123 101 Planet 2

These images are actually 4k images (yes, you can run Starflight in full resolution on 4K and 8K screens!) which will allow you to see the planets in better detail when you zoom onto them.  To do that, click on the image, and then when the image pops up on your screen, right click on it and select the “open in new tab” option.  This will open the full-sized image into a new browser tab, and in that tab, you are able to zoom in.  You can also download them to your computer.

Here’s another one…

125 100 Planet 1

And here is what Arth looks like now…

Arth

I am pleased with the results!

There is some room for improvement – for example, I can zero out the difference map where it’s too far below the water level to make any difference.  That will allow these difference maps to be compressed at a higher ratio, saving some space on disk.  But I have been putting off doing that because it takes roughly 24 full hours to regenerate all of the 811 planet maps, and that’s on my 10 core Alienware machine (yes, the planet generator is multithreaded).

You may also have noticed in these screenshots something else that is new… atmosphere.  I have gone ahead and added an atmosphere effect to planets in the game – there is a halo around planets where the atmosphere is and the color of the halo depends on what gases make up the atmosphere for the planet.

Here is a bonus image – one of a gas giant.  I had just realized that I was talking about my planet generator which does it’s magic only for solid planets.  What about those gas giants in the game?  I do just a simple blur – a ton of blur on the X-axis and only a little blur on the Y-axis.  That gives me this:

Gas Giant

And that is the end of this blog post!

By |2019-01-11T14:33:18-07:00January 10th, 2019|Starflight|0 Comments
Go to Top